
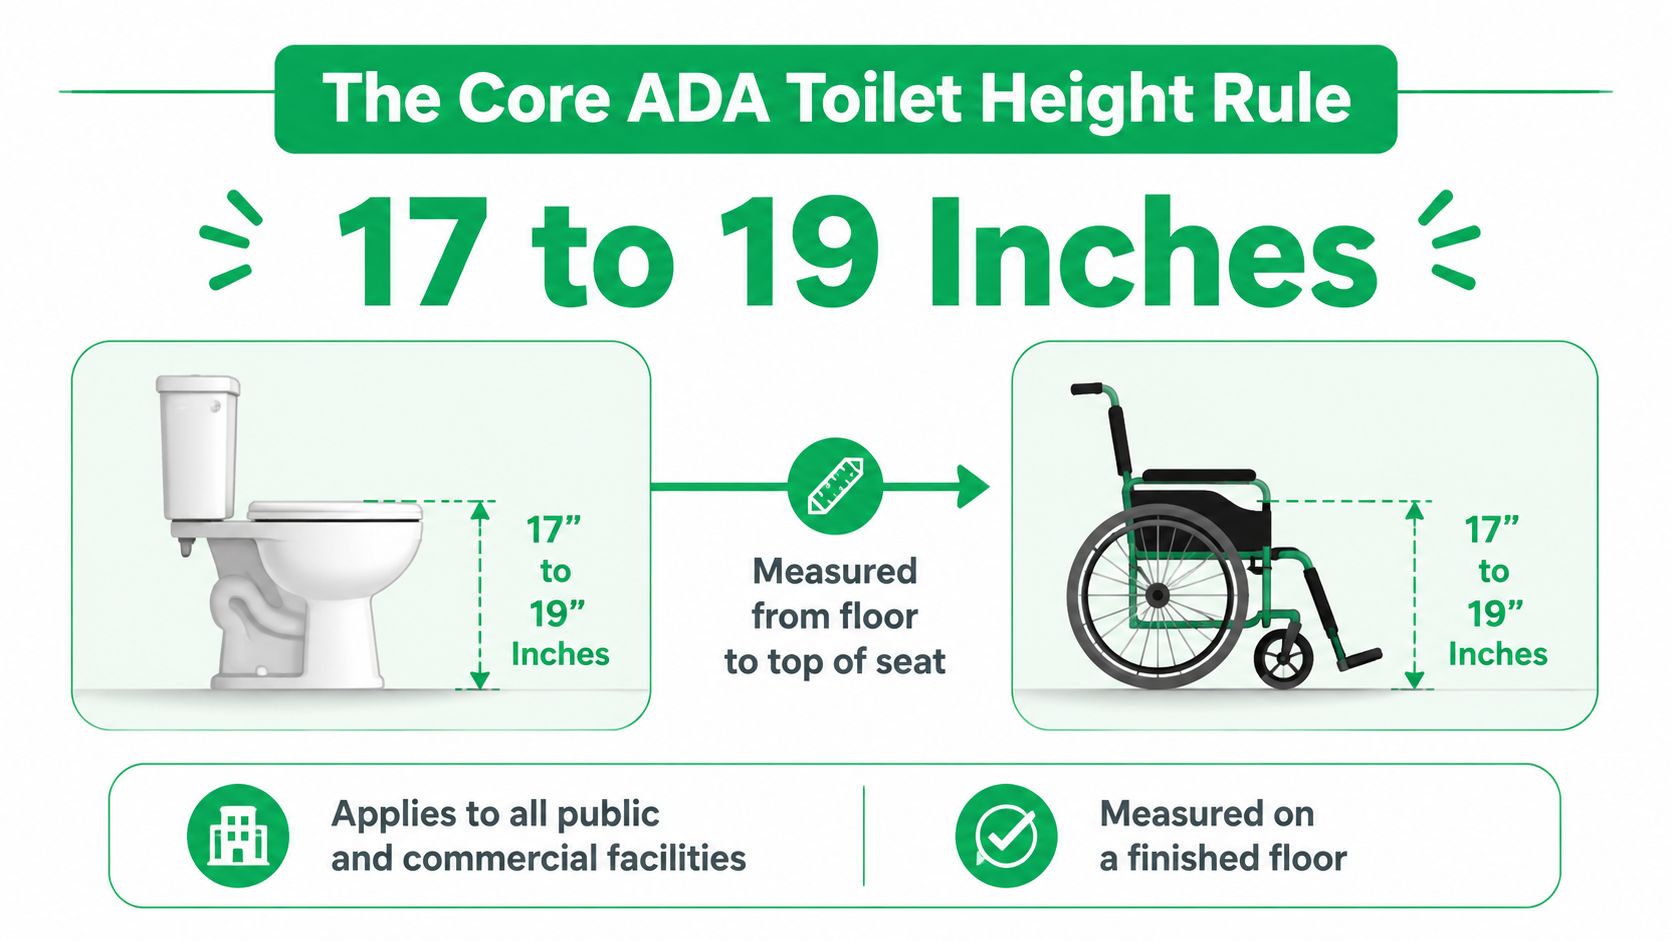
ADA Compliant Toilet Height: The ada compliant toilet height is 17 to 19 inches from the finished floor to the top of the seat. For children’s toilet rooms, the ADA uses a lower range, 11 to 17 inches, depending on age.
If you’re standing in a jobsite restroom with a tape measure in one hand and a product spec sheet in the other, that’s the decision that matters. The label on the box does not pass inspection, the installed height does. And if the restroom serves the wrong age group, the adult benchmark can be the wrong answer entirely.
ADA Compliant Toilet Height: The Core ADA Toilet Height Rule Explained
A restroom can look finished and still fail inspection if the seat height is off. For the 2010 ADA Standards for Accessible Design, the water closet seat has to measure 17 inches minimum and 19 inches maximum above the finished floor, to the top of the seat. In children’s toilet rooms, the standard shifts to 11 inches minimum and 17 inches maximum, which matters when the space serves schools, child care, or other age-specific facilities. For the exact federal language, keep the U.S. Access Board Chapter 6 plumbing requirements open while you review the job.
Why that range exists
The height range supports safer transfers for people using wheelchairs or walkers. When the seat sits in the 17 to 19 inch band, the move from mobility device to toilet is shorter and easier to manage in real use. That is why trade talk often refers to “comfort height” or “chair height,” even though the legal test is still the installed measurement, not the sales term on the carton.
The practical side matters on projects that will be inspected. Office fit-outs, retail restrooms, healthcare facilities, and hospitality spaces all run into the same issue, product marketing can suggest compliance, but the installation has the final say. If you want a broader planning reference for renovations, the Melbourne accessible bathroom 2026 guide is a useful companion when you are comparing fixture choices with site conditions.
Practical rule: if the installed seat falls outside the range, the toilet fails the height test, no matter what the box says.
Facility managers who want a fuller compliance reference can also keep the ADA compliance resource handy while checking drawings, fixture submittals, and the final punch list.
ADA Compliant Toilet Height: How to Measure Correctly and Avoid Common Mistakes
Measure from the finished floor to the top of the installed seat. Not the bowl rim. Not the rough floor. Not the catalog spec. That distinction is where a lot of near-miss projects go sideways, especially after tile, underlayment, and seat hardware are all in place.
Measure the installed condition, not the marketing label
The most common mistake is assuming a toilet marketed as “comfort height” is automatically compliant. It isn’t. Because the ADA measure includes the seat, installers must verify the as-installed height rather than relying on the bowl’s nominal specification, since an elongated seat, hinge geometry, or floor finish buildup can shift the final measurement and create a compliance failure. Rethink Access on toilet seat height
That’s the field lesson. A product sheet tells you what the manufacturer intended. The tape measure tells you what the inspector sees.
Field note: check the toilet after the seat is mounted and after finish flooring is complete. That’s the only measurement that counts.
Where crews get tripped up
A seat can land below spec because the finish floor ended up thicker than expected. A hinge choice can change the final top-of-seat dimension. Even the wrong replacement seat can move a compliant bowl into a noncompliant install. Those are small changes on paper, but on site they’re enough to cause rework.
The cleanest habit is to measure the finished installation in the exact state it will be presented for inspection. If the seat is compressed during the reading, if the tape is set on the wrong surface, or if the floor finish is still temporary, the number is meaningless. That’s why the as-built condition matters more than the purchase order.
Later in a remodel, after fixtures are set and flooring is in, you can’t “average out” a bad measurement. You either have the right seat height or you don’t. And if you’re coordinating with other scopes, the minimum space for a toilet UK article is a handy comparison point for seeing how layout concerns influence the final install.
ADA Height vs Comfort Height Toilets
“Comfort height” sounds like a compliance term, but it’s really a marketing phrase. It often points toward the right range, yet it still doesn’t guarantee the installed seat lands where the ADA requires it.
Why the labels can mislead
A standard residential toilet has traditionally sat around 15 to 16 inches from floor to seat, while ADA-compliant toilets must be 17 to 19 inches high. That 1 to 4 inch gap is the reason many users feel the difference immediately. It changes transfer ease for wheelchair users and older adults, and it also changes whether someone can stand up and sit down without extra strain. Meltplan on standard toilet fixture height
The trade issue is simple. A fixture can be sold as “comfort height,” “right height,” or “universal height,” and still fail if the installed seat comes in under 17 inches. So the buyer’s job is not just to choose the right product family. It’s to verify the final installed dimension.
ADA Compliant Toilet Height: How to specify without guessing
If a project needs ADA compliance, the spec should be built around the measured outcome, not the showroom language. That means checking the seat height after the full installation sequence is done, especially in multifamily common areas, office buildings, healthcare environments, hotels, and restaurants where inspectors care about the built condition.
A good rule is to treat “comfort height” as a starting clue, not a certificate. It tells you the toilet may be in the right neighborhood. It does not tell you the measurement survives flooring changes, seat changes, or installer variation. That’s where a lot of procurement teams get caught.
For inclusive product selection more broadly, the inclusive design resource is a useful follow-up because accessible fixture choices work best when they’re planned as part of the whole restroom, not as an afterthought.
ADA Compliant Toilet Height: Beyond Height Essential Clearances and Grab Bars
A toilet at the right height can still fail an inspection if the room around it is wrong. In the field, accessibility is judged as an installed condition, not a product label. The seat height, approach space, transfer side, and exit path all have to work together.
The fixture has to fit the room
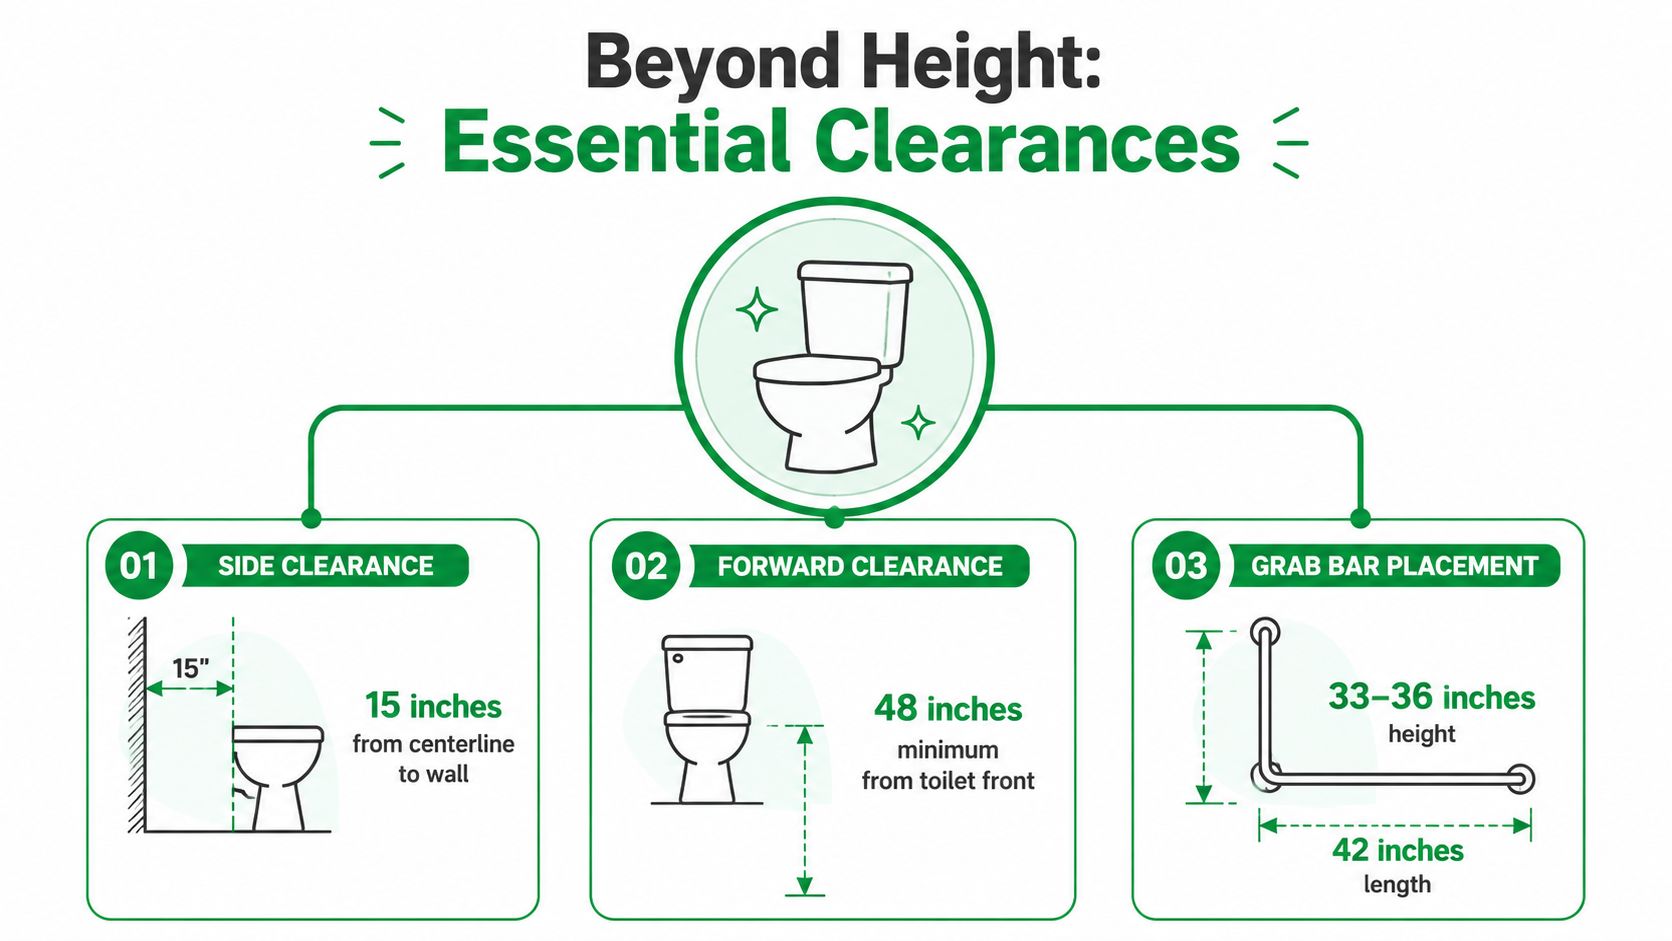
The ADA layout rules go beyond seat height. Accessible toilet layouts also call for the bowl centerline to sit 16 to 18 inches from the side wall, with at least 60 inches of clear floor space and stall depths of 59 inches for floor-mounted or 56 inches for wall-hung toilets.
That clearance is what makes a side transfer possible. A toilet can be sold as compliant and still end up too tight once flooring, tile buildup, wall framing, or an oversized partition are in place. The product spec may look correct on paper. The installed room is what gets judged.
The same problem shows up in smaller washrooms outside the ADA context. A project can meet the fixture target and still miss the room geometry, which is why references such as minimum space for a toilet UK are useful when teams are checking real-world spacing instead of relying on marketing language.
ADA Compliant Toilet Height: Grab bars finish the system
Grab bars belong in the same conversation because they make the height usable. The toilet height only works if a user can reach the bar, shift weight, and complete the transfer without fighting the wall or the partition. In practice, the toilet, clearances, and bar placement have to be coordinated together, not handed off to separate trades that never check the final layout as one system.
The inspection does not care that the toilet was “the right one” if the room cannot support a side transfer.
Inspectors and facility managers usually run into trouble at the installed stage, not the purchasing stage. The bowl may match the specification sheet, but if the grab bar lands in the wrong place, the space around the fixture is too narrow, or the transfer side is blocked, the restroom still fails the real test. For product planning, Best Flushing Toilets ADA guide is a useful reminder that the toilet itself is only one part of the compliance check.
Special Cases Childrens Toilet Height Requirements
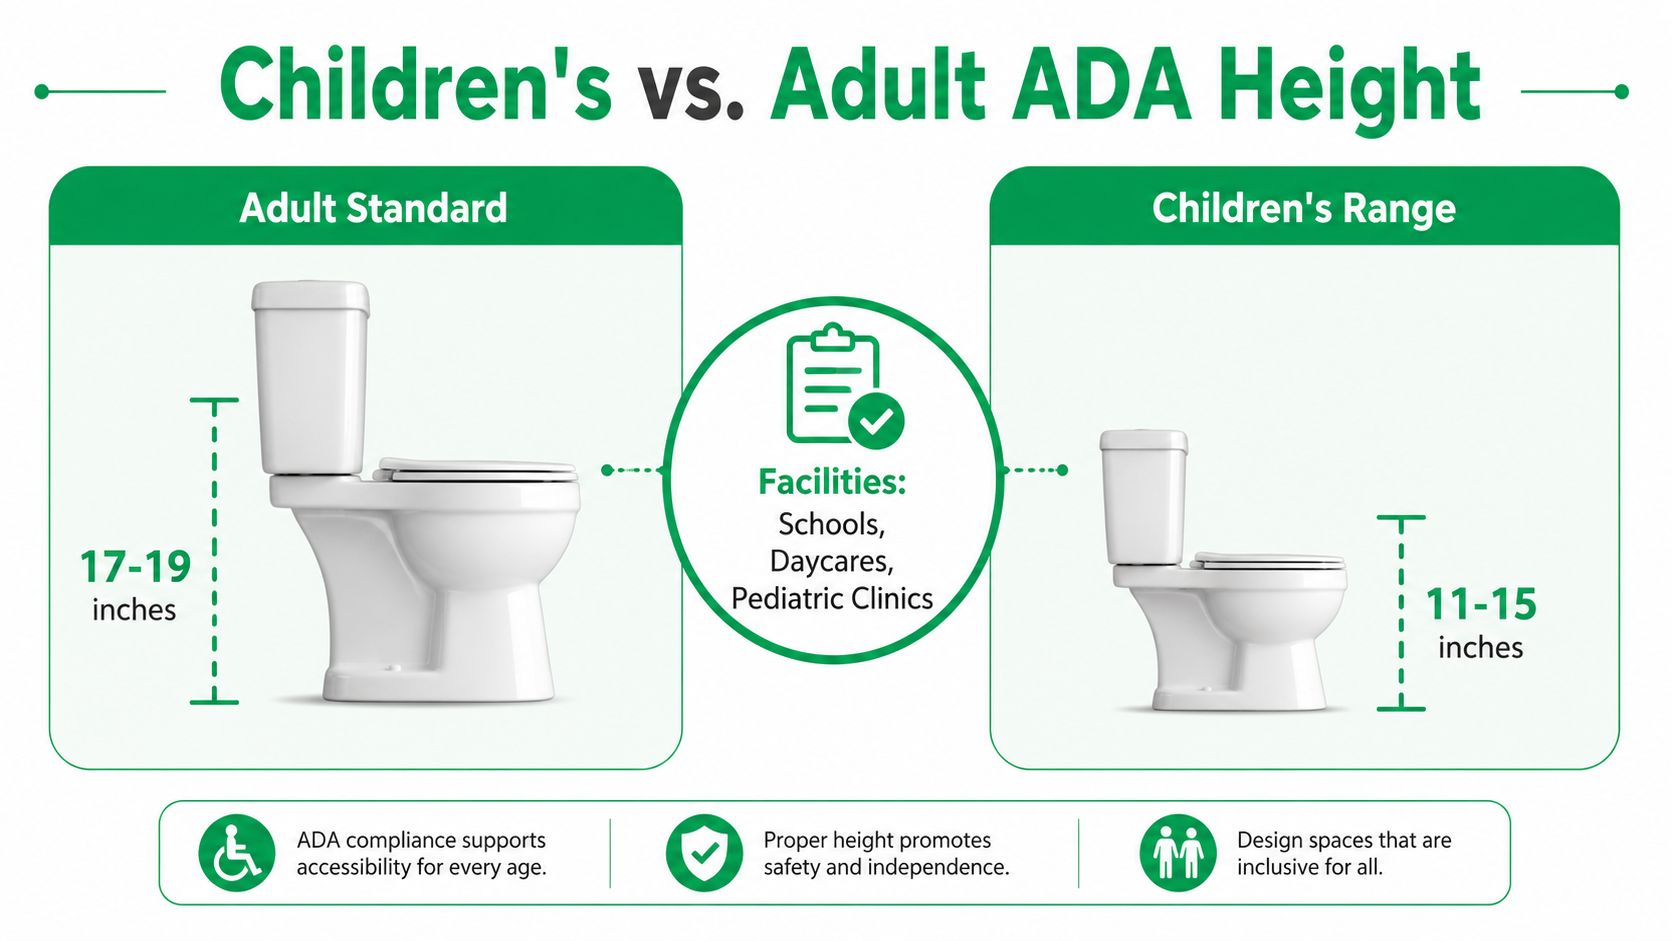
The adult 17 to 19 inch rule does not apply to every restroom. In children’s toilet rooms, the ADA uses lower ranges because a child’s transfer height and reach pattern are different from an adult’s, and forcing adult dimensions into a pediatric setting can make the room harder to use.
Age-specific ranges matter
The U.S. Access Board’s toilet-room guidance shows 11 to 12 inches for ages 3 to 4, 12 to 15 inches for ages 5 to 8, and 15 to 17 inches for ages 9 to 12, along with age-specific water-closet centerline guidance. U.S. Access Board toilet-room guidance
That is the part many general guides miss. Schools, daycares, pediatric clinics, and family-focused facilities need the right size for the users in the room. If you install adult-height toilets everywhere, you haven’t made the space more accessible for young children. In some rooms, you’ve made it worse.
Why the lower height is the correct choice
For children, the goal is independent use and safe transfer, not matching the adult standard by default. A lower seat better fits the body mechanics of younger users and reduces the awkward climb that an adult-height fixture can create. So “higher is always better” is not a reliable rule here. The right answer depends on the room and the age group.
That’s why pediatric projects need a separate review at the design stage, not a quick substitution during procurement. A compliant adult fixture in the wrong children’s room can still be the wrong product. If you need a project reference for this kind of planning, the ADA bathroom blueprint for Michigan homes gives a useful example of how dimensional thinking changes with the space and the user group.
A Quick Compliance Checklist for Your Project
Use this list during the site walk, submittal review, or punch-list check. If you are managing a restroom project, this is the part that keeps marketing claims and as-installed reality from drifting apart. A fixture can look compliant in a brochure and still fail once the floor is in, the seat is mounted, and the room is measured for use.
- Adult toilet seat height: confirm 17 to 19 inches from the finished floor to the top of the installed seat, not the bowl. That is the range that matters in a public or commercial restroom.
- Children’s toilet rooms: verify the room is being designed for the correct age band. The ADA guidance uses 11 to 12 inches, 12 to 15 inches, or 15 to 17 inches, depending on the child’s age. General guides often skip this, but schools, daycares, and pediatric spaces cannot.
- Measure the right way: check the finished floor and the installed seat, then measure the final condition. If the flooring changes or the seat sits higher than planned, the result changes too. As noted in the toilet seat height measurement guide, the as-installed setup is what decides compliance.
- Do not trust the label alone: “comfort height” is a product description, not proof of compliance. A tall-looking model can still land outside the required range once installed.
- Check layout, not just fixture height: the bowl centerline must sit 16 to 18 inches from the side wall, and the stall needs enough clear floor space to function as a transfer area. A toilet that is the right height can still fail if the room is too tight.
- Confirm the room supports use: grab bars, approach space, and maneuvering room all affect whether the toilet is usable in the field.
- Review the final installation, not the submittal photo: flooring build-up, seat geometry, and replacement parts can change the finished measurement. The fixture that passed on paper may not pass after install.
- Use a broader project checklist before handoff: if your team is tracking accessibility across the whole property, the website accessibility checklist is a useful model for keeping compliance tasks organized and visible.
If you are auditing a restroom project, build this list into the submittal review and final punch walk before the inspector arrives. For a broader digital strategy partner that understands accessibility-minded web content, service businesses, and compliance-driven messaging, Mr. Green Marketing, LLC can help you turn expertise into a stronger online presence. Visit Mr. Green Marketing, LLC to see how their team supports brands that want clarity, trust, and better visibility.
Leave a Comment
sing in to post your comment or sign-up if you dont have any account.